10. Configurando la interfaz para iniciar sesíon
“Django comes with a user authentication system. It handles user accounts, groups, permissions and cookie-based user sessions.”
Hasta el momento, sólo puedes crear y editar marcadores con el sitio de administración. Los siguientes pasos te muestran como crear un formulario para iniciar una sesión en la interfaz.
Django viene con una aplicación llamada django.contrib.auth que incluye todo lo necesario para autenticar a un usuario. El elemento centra es el el model User que ya usaste para almacenar el dueño en el modelo Bookmark. Contiene campos para almacenar el nombre de usuario, la contraseña y el correo electrónico. Puedes encontrar una lista completa de campos en la documentación.
La autenticación funciona de la siguiente manera:
Si un usuario inicia sesión, se establece una cookie con un identificador de sesión único. El navegador enviará la cookie con cada petición. Con el identificador de sesión el usuario correspondiente es asignado a la petición y el usuario puede acceder al objeto User con request.user como se hizo en la vista bookmark_view.
Vamos a crear dos vistas para permitir a los usuarios iniciar sesión sin el sitio de administración.
10.1. URLconf
First, you have to add the import of the reverse_lazy() function at the top
and two additional URLs to the end of URLconf mysite/urls.py.
1 2 3 4 5 6 7 8 9 10 11 12 13 14 15 16 17 18 19 20 21 22 23 24 25 26 27 | """mysite URL Configuration
The `urlpatterns` list routes URLs to views. For more information please see:
https://docs.djangoproject.com/en/1.8/topics/http/urls/
Examples:
Function views
1. Add an import: from my_app import views
2. Add a URL to urlpatterns: url(r'^$', views.home, name='home')
Class-based views
1. Add an import: from other_app.views import Home
2. Add a URL to urlpatterns: url(r'^$', Home.as_view(), name='home')
Including another URLconf
1. Add an import: from blog import urls as blog_urls
2. Add a URL to urlpatterns: url(r'^blog/', include(blog_urls))
"""
from django.conf.urls import include, url
from django.contrib import admin
from django.core.urlresolvers import reverse_lazy
urlpatterns = [
url(r'^admin/', include(admin.site.urls)),
url(r'^', include('marcador.urls')),
url(r'^login/$', 'django.contrib.auth.views.login', {'template_name': 'login.html'},
name='mysite_login'),
url(r'^logout/$', 'django.contrib.auth.views.logout',
{'next_page': reverse_lazy('marcador_bookmark_list')}, name='mysite_logout'),
]
|
The function reverse_lazy() is similar to the url template tag you have
used in the previous chapter. It returns a link to
the URL passed to it as the first argument, but can even be executed before
your project’s URLConf is loaded.
Los URLs /login/ y /logout/ están vinculados con las vistas correspondientes. Estas vistas están incluidas en Django y no necesitan ser creadas. Sólo tienes que configurar la plantilla para la vista de inicio de sesión y la re dirección de la vista para cerrar la sesión.
10.2. Configuración
Next, you create three new constants at the end of file settings.py:
110 111 112 | LOGIN_URL = 'mysite_login'
LOGOUT_URL = 'mysite_logout'
LOGIN_REDIRECT_URL = 'marcador_bookmark_list'
|
These constants configure the automatic redirect after the login and the
logout. For example if a user who is not authenticated wants to access a
protected page, she’ll be automatically redirected to /login/ where she can
log in because this is the URL where mysite_login refers to. The constants
should either be simple strings which match a named URL pattern from the
URLconf or URLs relative to the current domain.
Since this template uses some functionality provided by crispy_forms we
will add it to INSTALLED_APPS in the settings file:
31 32 33 34 35 36 37 38 39 40 41 42 | # Application definition
INSTALLED_APPS = (
'django.contrib.admin',
'django.contrib.auth',
'django.contrib.contenttypes',
'django.contrib.sessions',
'django.contrib.messages',
'django.contrib.staticfiles',
'marcador',
'crispy_forms',
)
|
crispy_forms comes with a template pack for Bootstrap 3. As this is not the default template pack we have to configure
crispy_forms to use it by adding the following line to the end of the
file settings.py:
114 | CRISPY_TEMPLATE_PACK = 'bootstrap3'
|
10.3. Plantillas
10.3.1. The main login template
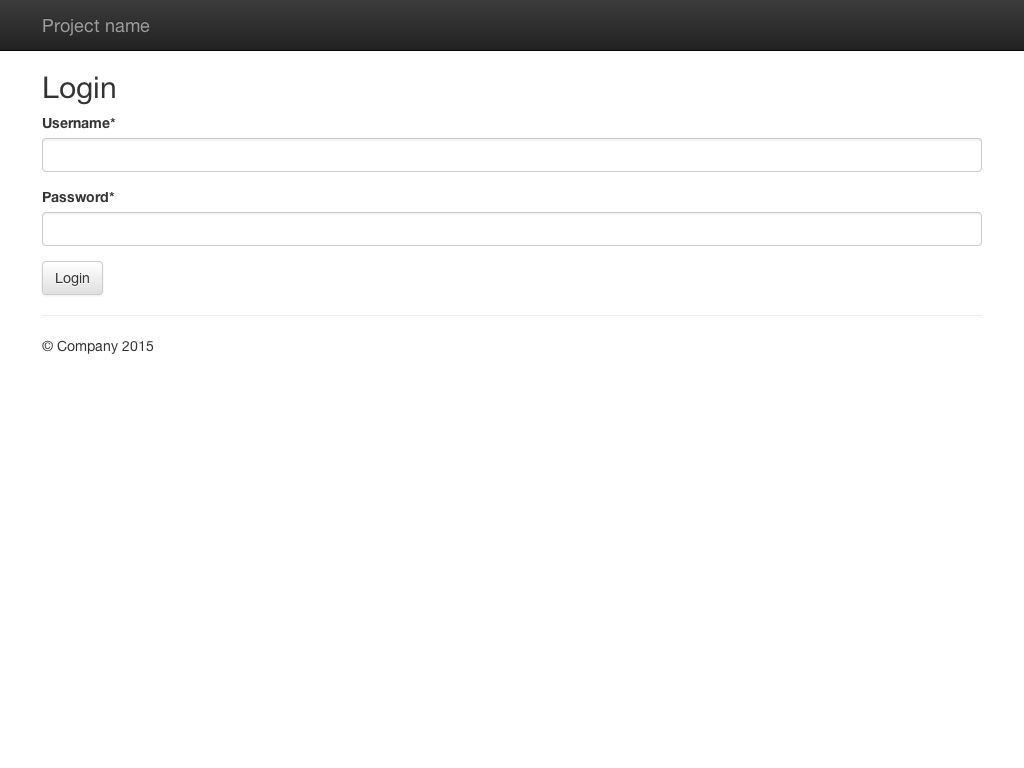
Ahora puedes crear la plantilla para el formulario para el inicio de sesión mysite/templates/login.html.
1 2 3 4 5 6 7 8 9 10 11 12 13 14 15 16 17 18 19 | {% extends "base.html" %}
{% load crispy_forms_tags %}
{% block title %}Login{% endblock %}
{% block toggle_login %}{% endblock %}
{% block heading %}
<h2>Login</h2>
{% endblock %}
{% block content %}
<form action="{% url "mysite_login" %}" method="post" accept-charset="utf-8">
{{ form|crispy }}
{% csrf_token %}
<input type="hidden" name="next" value="{{ next }}">
<input class="btn btn-default" type="submit" value="Login">
</form>
{% endblock %}
|
Primero creamos un formulario en el bloque content. La etiqueta <form> recibe atributos para hacer que envíe el pedido POST a la vista de inicio de sesión.
The template gets a variable form from the login view which contains
the login form. With {{ form|crispy }} Django creates all necessary
input fields. Of course you can also render all fields separately. How
to do that is described in the documentation.
The next row contains the template tag {% csrf_token %}. It is used to
activate Django’s protection against manipulated form
requests (Cross Site Request Forgery).
Después de eso viene un campo de entrada oculto que obtiene el valor de la variable next. next contiene la ruta a la que el usuario debería ser re dirigido después de un inicio de sesión exitoso. Por lo general, este es el valor de la constante LOGIN_REDIRECT_URL que definiste en el archivo settings.py. El valor por defecto es reemplazado si pides la página con un parámetro adicional. Por ejemplo, /login/?next=/user/bob/ re dirigirá al usuario a la página con los marcadores de Bob después de iniciar la sesión.
Finally we create a button to submit the form.
10.4. Test the frontend login
Now users can log in and out in the frontend using the form and the dropdown
menu at the top, which are rendered using the
mysite/templates/toggle_login.html template:
Call http://127.0.0.1:8000/user/admin/ to see the login form which you build at
first in mysite/templates/login.html (replace admin with the name
of the user you created when executing createsuperuser):
The main login form is also used if the authentication via the form at the top fails.