9. Plantillas
“Django’s template language is designed to strike a balance between power and ease. It’s designed to feel comfortable to those used to working with HTML. If you have any exposure to other text-based template languages, such as Smarty or Jinja2, you should feel right at home with Django’s templates.”
Para ver los contenidos que son generados por las vistas que acabamos de crear, ahora necesitas preparar las plantillas.
9.1. El sistema de plantillas de Django
Django tiene su propio sistema de plantillas para crear HTML que no simplemente mezcla código Python y HTML. Esto se hace por una razón: el sistema de plantillas debería utilizarse para mostrar contenidos y no para la lógica de programación.
The Django template system provides various tags to perform simple operations. For example can the if tag be used to execute various tests or the for tag to iterate over a list. However the templates are not executed like regular Python code and the choice of functions is limited to the tags and filters provided by the Django template system. But it is possible to extend the template system with your own tags and filters.
Aparte de eso, el sistema de plantillas de Django tiene una característica de herencia poderosa. Con esta característica es posible usar una plantilla base que contiene todos los elemento básicos del sitio Web y define diferentes bloques. Algunos o todos estos bloques pueden ser sobre escritos o extendidos por plantillas hijas que extienden la plantilla base. Aquellos que están familiarizados con la programación orientada a objetos conocen este patrón.
9.2. Create the base template
At first create the base template with the help of the HTML5 Boilerplate. It comes together with Bootstrap 3, a popular HTML and CSS framework for developing responsive, mobile first websites and jQuery, a fast, small, and feature-rich JavaScript library. Perform the following steps to download and copy the files:
- Click at the Initializr Website on “Bootstrap”
En la sección “H5BL Optional” marca la opción “404 Page”
Finalmente haz click en el botón “Download it!”
Extrae el archivo ZIP
Copia el archivo
index.htmlal directoriomysite/templates' y cambia el nombre a :file:`base.htmlCopia el archivo
404.htmlal mismo directorio- Copy the directories
css,imgandjsand the fileapple-touch-icon.pnginto the directorymysite/static
Nota
Para hacer funcionar la descarga del archivo ZIP de HTML5 Boilerplate tu navegador necesita aceptar las cookies del sitio Web.
Now you need to adjust the base template base.html so that Django is
able to able to use the right path for the static files. Therefor you will use
the static template tag from
the staticfiles app. Template tags are written this way: {% tag %}. Because
the tag static is provided by an app it’s not part of the default template
tags and needs to be loaded first. This is done with the help of the
load tag at the top of the
template. Customize all highlighted parts in the head of base.html as
shown:
1 2 3 4 5 6 7 8 9 10 11 12 13 14 15 16 17 18 19 20 21 22 23 24 25 26 27 | {% load staticfiles %}
<!doctype html>
<!--[if lt IE 7]> <html class="no-js lt-ie9 lt-ie8 lt-ie7" lang=""> <![endif]-->
<!--[if IE 7]> <html class="no-js lt-ie9 lt-ie8" lang=""> <![endif]-->
<!--[if IE 8]> <html class="no-js lt-ie9" lang=""> <![endif]-->
<!--[if gt IE 8]><!--> <html class="no-js" lang=""> <!--<![endif]-->
<head>
<meta charset="utf-8">
<meta http-equiv="X-UA-Compatible" content="IE=edge,chrome=1">
<title></title>
<meta name="description" content="">
<meta name="viewport" content="width=device-width, initial-scale=1">
<link rel="apple-touch-icon" href="{% static "apple-touch-icon.png" %}">
<link rel="stylesheet" href="{% static "css/bootstrap.min.css" %}">
<style>
body {
padding-top: 50px;
padding-bottom: 20px;
}
</style>
<link rel="stylesheet" href="{% static "css/bootstrap-theme.min.css" %}">
<link rel="stylesheet" href="{% static "css/main.css" %}">
<script src="{% static "js/vendor/modernizr-2.8.3-respond-1.4.2.min.js" %}"></script>
</head>
<body>
|
Ahora sigue los lugares donde la etiqueta static necesita ser colocada al final de la plantilla base.html:
87 88 89 90 91 92 93 94 95 96 97 98 99 100 101 102 103 104 105 106 107 | <footer>
<p>© Company 2015</p>
</footer>
</div> <!-- /container --> <script src="//ajax.googleapis.com/ajax/libs/jquery/1.11.2/jquery.min.js"></script>
<script>window.jQuery || document.write('<script src="{% static "js/vendor/jquery-1.11.2.min.js" %}"><\/script>')</script>
<script src="{% static "js/vendor/bootstrap.min.js" %}"></script>
<script src="{% static "js/main.js" %}"></script>
<!-- Google Analytics: change UA-XXXXX-X to be your site's ID. -->
<script>
(function(b,o,i,l,e,r){b.GoogleAnalyticsObject=l;b[l]||(b[l]=
function(){(b[l].q=b[l].q||[]).push(arguments)});b[l].l=+new Date;
e=o.createElement(i);r=o.getElementsByTagName(i)[0];
e.src='//www.google-analytics.com/analytics.js';
r.parentNode.insertBefore(e,r)}(window,document,'script','ga'));
ga('create','UA-XXXXX-X','auto');ga('send','pageview');
</script>
</body>
</html>
|
Ahora reemplaza la etiqueta HTML title con la línea resaltada:
7 8 9 10 11 12 | <head>
<meta charset="utf-8">
<meta http-equiv="X-UA-Compatible" content="IE=edge,chrome=1">
<title>Marcador - {% block title %}{% endblock %}</title>
<meta name="description" content="">
<meta name="viewport" content="width=device-width, initial-scale=1">
|
Aquí, el primer bloque (vacío) sera definido con la ayuda de la etiqueta block.
Delete the <div> HTML tag overwritten with <!-- Main jumbotron for a
primary marketing message or call to action --> including it’s contents. Here
can see the lines you have to delete:
56 57 58 59 60 61 62 63 | <!-- Main jumbotron for a primary marketing message or call to action -->
<div class="jumbotron">
<div class="container">
<h1>Hello, world!</h1>
<p>This is a template for a simple marketing or informational website. It includes a large callout called a jumbotron and three supporting pieces of content. Use it as a starting point to create something more unique.</p>
<p><a class="btn btn-primary btn-lg" href="#" role="button">Learn more »</a></p>
</div>
</div>
|
Below you will see another <div> HTML tag follow by <!-- Example row of
columns -->. Delete the HTML comment and the following HTML tag <div
class="row"> including it’s contents. Here can see the lines you have to
delete:
66 67 68 69 70 71 72 73 74 75 76 77 78 79 80 81 82 83 | <!-- Example row of columns -->
<div
class="row">
<div class="col-md-4">
<h2>Heading</h2>
<p>Donec id elit non mi porta gravida at eget metus. Fusce dapibus, tellus ac cursus commodo, tortor mauris condimentum nibh, ut fermentum massa justo sit amet risus. Etiam porta sem malesuada magna mollis euismod. Donec sed odio dui. </p>
<p><a class="btn btn-default" href="#" role="button">View details »</a></p>
</div>
<div class="col-md-4">
<h2>Heading</h2>
<p>Donec sed odio dui. Cras justo odio, dapibus ac facilisis in, egestas eget quam. Vestibulum id ligula porta felis euismod semper. Fusce dapibus, tellus ac cursus commodo, tortor mauris condimentum nibh, ut fermentum massa justo sit amet risus.</p>
<p><a class="btn btn-default" href="#" role="button">View details »</a></p>
</div>
</div>
|
Now add two additional blocks to the remaining <div> HTML tag; one for the
headline and the other for the contents of the current page:
50 51 52 53 54 55 56 57 58 59 60 61 62 63 | <div class="container">
<div>
{% block heading %}{% endblock %}
</div>
<div>
{% block content %}{% endblock %}
</div>
<hr>
<footer>
<p>© Company 2015</p>
</footer>
</div> <!-- /container --> <script src="//ajax.googleapis.com/ajax/libs/jquery/1.11.2/jquery.min.js"></script>
|
That’s it! The base template is done!
9.3. Create the templates for the views
Now the base template is finished. The next step is to create the missing templates for the views. First create the appropriate directory structure:
$ mkdir -p marcador/templates/marcador
This structure is necessary so that the template loader can load the
templates. After that the app marcador has this structure:
marcador
|-- __init__.py
|-- admin.py
|-- migrations
|   |-- 0001_initial.py
|   `-- __init__.py
|-- models.py
|-- templates
|   `-- marcador
|-- tests.py
|-- urls.py
`-- views.py
Nota
Si el servidor de desarrollo se ejecutaba mientras se creaban los nuevos directorios, tienes que re iniciarlo. De otra manera no se reconocerán los nuevos directorios.
Ahora crea las plantillas dentro del directorio marcador/templates/marcador.
Primero la plantilla para la vista de lista bookmark_list.html:
1 2 3 4 5 6 7 8 9 10 11 12 13 14 15 16 17 | {% extends "base.html" %}
{% block title %}Latest bookmarks{% endblock %}
{% block heading %}
<h2>Latest bookmarks</h2>
{% endblock %}
{% block content %}
<ul class="list-unstyled">
{% for bookmark in bookmarks %}
<li class="well well-sm">{% include "marcador/bookmark.html" %}</li>
{% empty %}
<li>No bookmarks. :(</li>
{% endfor %}
</ul>
{% endblock %}
|
Esta plantilla extiende la plantilla base base.html con la ayuda de la etiqueta extends. Por ello es posible extender los bloques definidos en la plantilla base. Además, la ya mencionada etiqueta for es usada para iterar sobre la lista de marcadores (bookmarks) y crear una entrada en la lista para cada uno. La plantilla para el marcador es incluída usando la etiqueta include.
Ahora puedes crear la plantilla bookmark.html que ha sido incluida en la anterior plantilla usando la etiqueta include:
1 2 3 4 5 6 7 8 9 10 11 12 13 14 15 16 17 | <a class="lead" href="{{ bookmark.url }}">{{ bookmark.title }}</a>
{% if bookmark.description %}
<br>{{ bookmark.description|linebreaksbr }}
{% endif %}
{% if not bookmark.is_public %}
<br><span class="label label-warning">private</span>
{% else %}
<br>
{% endif %}
{% if bookmark.tags.count %}
{% for tag in bookmark.tags.all %}
<span class="label label-primary">{{ tag|lower }}</span>
{% endfor %}
{% endif %}
<br>by <a href="{% url "marcador_bookmark_user" bookmark.owner.username %}">
{{ bookmark.owner.username }}</a>
{{ bookmark.date_created|timesince }} ago
|
En esta plantilla un objeto Bookmark está disponible que es asignado a la variable bookmark. En una plantilla es posible acceder a los atributos de un objeto, por ejemplo el título usando bookmark.title. Los atributos pueden ser modificados por filtro, por ejemplo usando linebreaksbr que convierte todas la etiquetas HTML <br /> en saltos de líneas reales.
También es posible acceder a objetos relacionados, por ejemplo las etiquetas. Ya que bookmark.tags es una lista de objetos representados por objeto manager, sólo puedes acceder a los objetos Tag con la ayuda de métodos definidos por el manager. bookmark.tags.count devuelve el número de etiquetas. bookmark.tags.all crea un iterador que puede ser usado en un bucle. Para invocar a estos métodos en tu código Python tienes que poner un par de paréntesis al final del método (bookmark.tag.count()). Si el método es invocado en una plantilla no se permiten paréntesis porque no se puede pasar argumentos a un método en una plantilla.
Con la ayuda de la etiqueta url un enlace a los otros marcadores del dueño del marcador es creado al final de la plantilla. Ya que el URL marcador_bookmark_user necesita un nombre de usuario, necesitamos pasarlo como argumento a la etiqueta de plantilla. Eso implica que argumentos se pueden pasar a etiquetas de plantillas.
Finalmente, la plantilla para los marcadores del usuario se debe crear, bookmark_user.html:
1 2 3 4 5 6 7 8 9 | {% extends "marcador/bookmark_list.html" %}
{% block title %}{{ owner.username }}'s bookmarks{% endblock %}
{% block heading %}
<h2>{{ owner.username }}'s bookmarks<br>
<small>{{ bookmarks.count }} bookmarks in total</small>
</h2>
{% endblock %}
|
Esta plantilla extiende la plantilla bookmarks_list.html porque sólo hay pequeñas diferencias entre ellas. Sólo tenemos que sobre escribir los bloques title y heading y podemos reutilizar el resto. ¡Muy práctico”
9.4. Test the new templates
Después de que todas las plantillas han sido creadas, puedes iniciar el servidor de desarrollo y echar un vistazo a los marcadores, que han sido creados usando la interfaz de administración, en la interfaz Web bajo http://127.0.0.1:8000/.
The list of bookmarks should look like this:
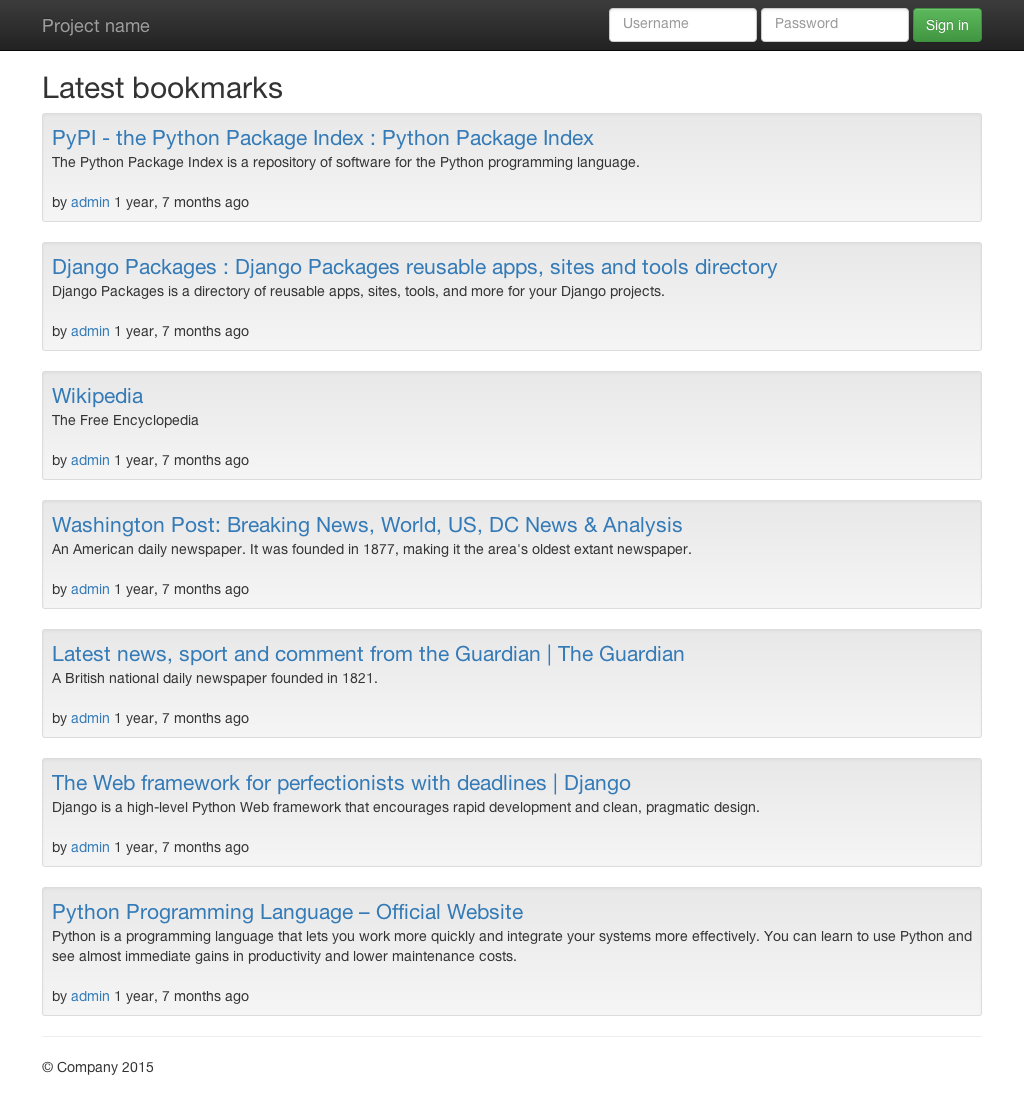
The login form at the top of the page does not work yet. But you will finish it right in the next chapter!